Friday, November 12, 2010

It's Been Too Long!

Hi everyone! And by everyone, I mean my 3 friends who read this blog. :) I haven't been posting much - it's been a busy month. I was lucky enough to find a great new job at the University of Arizona that I began on November 1 (my last day with Residence Life was October 22). It's been a good transition so far, but I feel like I have even less time to cook than before! And Mike is finally done with the Air Force and is officially a veteran now. He's going to school full time at UA to finish his degree.

To make this post even more off-topic, I'm actually going to be talking about Christmas cards. Yup, it's that time of the year. Is it just me or is it near impossible to do photo cards (a la Shutterfly)? It's so darn hard to find that one picture that makes you look super cool and thin and worldly.

I started trying to figure a card out last night on shutterfly.com  - I'm partial to them because a) I worked there, b) they have really cute designs that Creative works hard to create....in the summer, and c) all of my pictures from like, the last 7 years are uploaded to Shutterfly.

I'm kind of enjoying this card, because I could put 4 different pictures of Mike and I, with little captions of what we happened to be doing or where we have traveled this year. One downside? This is a folded card, which means I would have to think of something to write on the inside. That takes some effort, and if you know me, I'm lazy! Ugh, decisions. Guess you will have to wait with bated breath to see what I come up with!

Sweet Chocolate Christmas Card
Shop Shutterfly for elegant custom Christmas photo cards.
View the entire collection of cards.

Tuesday, September 21, 2010

Welcome Fantabulously Frugal Readers!


I hope you enjoyed my guest post over at Fantabulously Frugal, and welcome to Diet Starts Monday! To help you become familiar with myself and my blog, check out my About Me section. For a comprehensive list of recipes (it's small but mighty!) that I have tried out, visit my Recipe Index.

Have questions or comments? Email me at: dietstartsmonday@gmail.com

Potato and Veggie Frittata


I made a frittata over the weekend. I am pretty sure I've never even tasted a fritatta, let alone made one, so it was a frightening proposition (eggs in the oven? Whaaaat?). It came out awesome, and I felt super fancy and cultured eating my frittata for breakfast. It tasted sorta like a crustless quiche, crossed with an omelette.

I had ripped the recipe out of a page of a long ago Family Circle magazine that I stole from my mom. I know, that's maybe the dorkiest sentence ever. Whatever. Anyway, I often will rip recipes out of magazines or newspapers to try later. I used to keep this hodgepodge of clippings in an old Ziploc bag (super classy) until I finally got my act together and organized them in a binder (which happened to have been my old wedding planning binder that I purged after the big day - it was too stressful planning my wedding, it was giving me PTSD!).


The ingredients. I seriously need to edit my photos before I post them, they look kinda dark and sad. Oh well. See that jar of roasted red peppers up there? Well, as I was starting to cook I opened it, and um, it had gone bad. Like "Hoarders" fridge bad. Ew. So I chucked it and subbed in some sun-dried tomatoes instead. Because they're also red. Seriously, that was my rationale. Also, I ended up just using 10 whole eggs instead of the 6 eggs and 4 egg whites called for in the recipe. I'm guessing they did that to lower the fat/calorie levels, but I'm not concerned. Both changes came out splendidly.


Melt butter into a large skillet on medium heat. Add the spinach and scallions and cook down for 4 minutes until it shrinks and resembles the photo.


Next, add in your previously microwaved potatoes (forgot to photograph that step) and your roasted red peppers (or in my case, sun-dried tomatoes).


Next, dump in your eggs and half the cheese. It will look like egg soup.


Cook for about 7 minutes, or until the edges start to firm up. Top with the remainder of the cheese, and pop into a 350-degree oven for 20 minutes. Crazy things will happen in there.


The eggs will start to puff up and brown - this is a good thing! After 20 minutes, pull it out of the oven (BE CAREFUL and use a pot holder, the handle is super hot and I totally singed my palm because I'm a goof). And voila! You are a fancy frittata maker! Go impress people with your skills, and tell 'em Diet Starts Monday sent ya.


Potato and Veggie Frittata

1 medium-size all-purpose potato, diced
2 tablespoons butter
2 cups packed baby spinach
2 scallions, trimmed and chopped
6 eggs
4 egg whites
1/2 teaspoon salt
1/4 teaspoon black pepper
4 ounces pepper-Jack cheese, shredded
1/2 cup roasted red pepper, chopped

Heat oven to 350°F. Place potatoes in a glass bowl or dish. Add 1/4 cup water; cover with plastic wrap, venting a side. Microwave on HIGH power for 5 minutes.

Melt butter in a 10-inch ovenproof nonstick skillet over medium heat. Add spinach and scallions; cook 4 minutes, until most of the liquid has evaporated.

In large bowl, whisk eggs, egg whites, salt, pepper and half the cheese.

Add red pepper and cooked potato to skillet; heat through. Add egg mixture to skillet and cook 7 minutes, until edge is just set; stir softer mixture in center halfway through cooking.

Remove skillet from heat and sprinkle with remaining cheese. Transfer to oven. Bake at 350°F for 20 minutes or until set. Carefully remove from oven (handle will be hot). Divide in wedges.

Source: Family Circle

Smoky Black Bean Chicken Wraps


Guess who was too lazy to cook dinner again??? Ding ding ding - you guessed it, ME! All the fall shows are starting up again, football is on, my SF Giants are in the pennant race, and it's all taking over my life. I have priorities, people.

And that's where my previous round of power cooking becomes super handy. On this occasion, I decided to make (or more like heat up) the Smoky Black Bean Chicken Wraps because I had tortillas and fun toppings (cheese, sour cream, avocados, and tomatoes) on hand. To recap, here's the recipe from my previous post:

Smoky Black Bean Chicken Wraps
To prepare and freeze
1 portion Make-Ahead Chicken
1 can (15 oz) black beans, drained and rinsed
3 tbsp Smoky Barbecue Rub, divided
2 cups cooked rice

To finish and serve
½ cup water
4 oz shredded cheddar cheese
6 11-in. flour tortillas
Shredded lettuce, diced tomatoes and barbecue sauce or Louisiana hot sauce (optional)
1. Prepare and freeze

In Bag 1, combine chicken, beans and 2 tbsp of the rub.
In Bag 2, combine rice and remaining 1 tbsp rub.
Seal Bag 2 and place into Bag 1; seal. Freeze for up to three months.
2. Finish and serve!
To cook and serve immediately:
Omit water. Place contents of Bags 1 and 2 into (12-in.) Skillet. Cook over medium-high heat 3-5 minutes or until chicken is heated through.
To assemble wraps, divide cheese evenly among tortillas; top with chicken mixture and optional ingredients, if desired.
Roll up tortillas tightly. Cut wraps in half on a bias and serve.

To cook and serve from freezer:
Add contents of Bag 1 and water to (12-in.) Skillet; cover. Cook over medium-high heat 6-8 minutes or until hot, breaking chicken apart as necessary using Bamboo Spatula.
Add contents of Bag 2 to Skillet; cook 4-6 minutes or until mixture is heated through.
Assemble wraps as directed above.

Yield: 6 servings

Alrighty then. Now that's out of the way, let's begin!

First, you take the bag with the chicken and beans and heat that up in a large skillet over medium. I know - WTF is corn doing in there? Well I had leftover corn on the cob, so I just cut off the kernels and threw them in there. Why not.


Then dump in the bag with the rice. It will be all clumpy because it's frozen, so just break it up a bit with a wooden spoon. It will all work out in the end.


After it's heated through, it will look like the above. Now is the time to heat up your tortillas in the microwave and assemble your toppings.


You don't need the whole kit and kaboodle (yeah, I just said that...I'm a granny apparently), just use what you have on hand. I decided to be healthy for like 5 minutes and use whole wheat tortillas. They tasted like caca. But you know, I was healthy! For 5 minutes!


Now, go crazy! The random toppings are the best part about burritos and wraps anyway. This recipe made six decent sized wraps. It was tasty but possibly a little bland if you ate the wraps plain. Just warning you/ But hey, better than running to Taco Bell and probably took all of 10 minutes tops!

Monday, September 20, 2010

Chicken and Mushroom "Hot Pockets"


My local grocery store was having a massive sale on canned biscuits recently. Since I'm a crazed coupon user, I was able to score about 10 cans for a dollar or two. Total. That's how I roll! Get it? ROLL! Ha. Needless to say, I have quite the glut of Grands! biscuits in my freezer (did you know you can freeze those tube things? You can. They won't explode. Promise).

After searching recipes on Pillsbury.com, I happened upon one that resembled a homemade chicken Hot Pocket (they titled it Chicken To Go Biscuits, but a) that doesn't make sense, and b) I can call a Hot Pocket when I see one). Speaking of Hot Pockets...that's another Jim Gaffigan comedy bit that I love. I swear this blog is turning into a Jim Gaffigan fanpage. Maybe because all he talks about is food, and that's all I write about...

Let's get started on the Hot Pockets! Sing it with me: "Hooooot Pock-ets!!!".


The ingredients. I made a few small changes I should warn you about - first, I had some sliced raw mushrooms in the fridge, so I just cooked those down really quick in a skillet instead of using the canned ones. Secondly, and more important, I did not use the crushed cornflakes as a breading as the recipe states  - because why? Also: ew! What kind of crazy person decided that cornflakes needed to be used on anything other than a bowl of milk? Cornflakes are kinda sweet too, and I don't want sweet near anything with chicken and/or mushrooms. It would be like coating your Hot Pocket with chocolate chips. Yeah, flippin' gross. The same argument goes for Hawaiian pizza and the insane people who like it. Why not pepperoni and oranges? Sausage and cherries? It's the same idea, you sickos!


Start by melting some butter in a skillet on medium heat, then stir in the flour, salt and pepper. It will quickly start to thicken up.


Dump in the milk, and heat for a minute or so.


Stir in the chicken, cheese, and mushrooms, take off the heat, and set aside. I kept snatching bits of this to eat because well, I'm chubby and I wanted to, so there.


Now take your can of biscuits and open it up. Or, if you're like me, make someone else (AKA my dear husband) do it for you because the anticipation of the can popping open wigs me out. You're going to want to roll out (or just use your hands to press out) the biscuits into a large circle, as large as you can get it. I found it helpful to sandwich the biscuit between sheets of wax paper, and also to do one biscuit at a time - when I rolled out all of the biscuits, by the time I started filling them they reverted back to their tiny normal shape. I even tried "tossing" the biscuits like pizza dough to stretch it out further. Place 1/3 cup of mixture onto the flattened biscuit.


Ugh, I need a manicure. Anyway, start pinching together the ends of the biscuit into a calzone shape. This was kind of a giant pain in the butt, but it got easier with practice.


Then, use a fork to go around the edges to press down and seal again.


Why do my fingers look so pink? Ew. Ahem. Dip the Hot Pocket into egg, then bread crumbs and place on an ungreased cookie sheet. Bake at 350 degrees for 20 minutes.


The final product. I let mine cool, taste tested one of them - it was yummy! Lightyears better than the storebought ones - then put the remainder in a freezer ziploc bag to take to work for lunchies. You can pop these directly from the freezer into the microwave for about a minute and 30 seconds,  or until the middle is molten lava.


Chicken Hot Pockets

2 tablespoons butter or margarine
2 tablespoons flour
1/4 teaspoon salt
Dash pepper
1/2 cup milk
2 cups cubed cooked chicken
1 1/4 cups (5 oz.) shredded Cheddar cheese
1/2 cup (4 oz.) chopped or sliced drained mushrooms
1 (16.3-oz.) can Pillsbury® Grands!® Refrigerated Buttermilk Biscuits
1 egg, slightly beaten
3 cups cornflakes, crushed (I used a cup of Italian breadcrumbs instead)
Heat oven to 375°F. In medium saucepan, melt butter; stir in flour, salt and pepper until well blended. Add milk all at once. Cook about 1 minute until thickened, stirring occasionally. Stir in chicken, cheese and mushrooms; set aside.

Separate biscuit dough into 8 biscuits. Roll or pat each into 5-inch circle. Place about 1/3 cup chicken mixture on each biscuit circle. Wrap dough around chicken mixture, pressing edges to seal.

Dip rolls in egg, then coat with crushed cornflakes. Place on ungreased cookie sheet. Bake at 375°F. for 20 to 25 minutes until golden brown.

Source: Pillsbury

Crispy Baked Chicken with Teriyaki Sauce


New policy here on Diet Starts Monday!: when a recipe is a bust, I'm not posting the step-by-step pics. I figure, what's the point, right?

Well kids, we're putting this policy into action today. I know, how convenient. I found a recipe online for the most delicious looking, faux-fried, chicken yummy perfection with a homemade teriyaki dipping sauce and started drooling. It looked like chicken katsu, one my favorite entrees from Hawaiian restaurants where the chicken is deep fried. Japanese restaurants also make something similar, but with pork. Mmmmm deep fried pork. Check it out the recipe here for yourself, why don't you? It's ok, I'll wait.

Doesn't that look just delish? Well, compare her glorious chicken with my hot mess above, and you have why this recipe was a bust. My chicken did not brown up at ALL, it was seriously was pale and scary in person. Maybe it's my oven? I considered putting it under the broiler to brown it up, but the broiler scares me (what?!? It gets too hot! Yes, I know that's the point).

The teriyaki sauce was good, but in my opinion, not really worth the effort to make at home when a good quality bottled sauce will do just fine. Here's the recipe below, if anyone else wants to give it a whirl.

Crispy Baked Chicken with Teriyaki Sauce

For the sauce:
3 tbsp. soy sauce
3 tbsp. freshly squeezed orange juice
3 tbsp. sake
3 tbsp. sugar
3 tbsp. mirin
For the chicken:
½ cup all-purpose flour
½ tsp. garlic powder
2 tsp. salt
½ tsp. pepper
2 large eggs
1½ cups panko breadcrumbs
1 lb. boneless, skinless chicken breasts (about 2-3)
Nonstick cooking spray


To make the sauce, combine the soy sauce, orange juice, sake, sugar and mirin in a small saucepan.  Bring to a boil, reduce the heat to low and let simmer for 6 minutes, until slightly thickened.  Remove from the heat and set aside.

Preheat the oven to 475˚ F.  In a shallow bowl or pie plate, whisk together the flour, garlic powder, salt and pepper.  In a second bowl, lightly beat the eggs together.  Place the panko in a third shallow bowl or pie plate.  Place a wire rack over a baking sheet and spray lightly with nonstick cooking spray.

Butterfly the chicken breasts into halves so that you have 4-6 pieces total.  Lightly season both sides of the chicken pieces with salt and pepper.  Using tongs and working with one piece of chicken at a time, dredge the chicken in the flour mixture to coat both sides.  Shake lightly to remove any excess.  Then dip into the eggs and shake gently to remove any excess.  Finally place in the panko, turning to coat well.  Transfer to the prepared wire rack.  Repeat with the remaining chicken pieces.  Once all the chicken pieces are in place, spray lightly with cooking spray.

Bake for 15 minutes, until the chicken is cooked through and the bread crumbs are golden.  Let rest a few minutes before slicing and serving.  Serve with the teriyaki dipping sauce.

Source: Annie's Eats

Thursday, September 16, 2010

Things I Want That I Love (AKA someone gimme $300, stat!)

Have you guys ever heard of Mindy Kaling? She's an actress/comedienne/writer on NBC's "The Office" (she plays Kelly Kapur). My friend Nicole and I have celebrity girl crushes on her, and dream about being a trio of best friends on zany adventures. No, we're not 12 years old shut up. :)

Anyway, Mindy used to blog about stuff she bought that she loves. It inspired me to start posting here and there about items in a similar fashion. But, since I'm not a famous actress (yet?!? ha, please), I'm twisting it and writing about my virtual wish list. Maybe an anonymous benefactor will just send me everything. That happens sometimes. Right?


All-Clad 51125 All Clad Stainless-Steel 12-Inch Fry Pan with Lid According to America's Test Kitchen (they know things), this is the best one out there out of every brand...and it has the price tag to prove it! It's available on Amazon for $90, and at fancy department stores for double that price. I recently purchased a cookbook in which every recipe (including desserts) is cooked in the aforementioned fry pan. It would be fiscally imprudent of me to NOT buy this pan.

The Lenox "Chirp" holiday accent plates.  The original Lenox "Chirp" china is what my husband and I (or just I, who are we kidding) registered for when we got married. I love the design, it's vintage, yet modern, Asian inspired, colorful, and definitely NOT boring like the china everyone else had on their wedding registry. We only use it for holidays, so these new accent plates would be perfection for Christmas. Granted, I've never hosted a Christmas dinner because I still live in a crappy apartment in a different state than both of our families, but that's neither here nor there. When that day comes, I want to be prepared with fancy plates, darn it!

Wednesday, September 15, 2010

I'm going to be a guest blogger!


One of my favorite blogs, Fantabulously Frugal, has graciously allowed me to guest post next week! I'm seriously excited about this, considering that Fantabulously Frugal is a for-real, legit, popular blog that tons and tons of people read daily - it will be my 15 minutes of internet fame. I'll be blogging about time and money saving tips for cooking at home, which is right up my alley. I'll post a link next week when it goes live. Yay me! Happy dance!

P.S. That picture is for my husband...AKA the only person I've ever met who looooves Futurama and the only reader who will "get" it.

Monday, August 23, 2010

Greek Chicken Orzo Skillet


Remember a million years ago when I made a crap ton of chicken and froze it into different meals (AKA power cooking)? Well, I finally tried one of them. I was scared, I admit it. But it actually came out ok! It's not the epitome of haute cuisine by any means, but definitely better than any other store bought frozen microwaved dinner shenanigans (although I don't know how Weight Watchers does it, but their Smart Ones Three Cheese Ziti is delicious, cheesy, yet low in points heaven - get on it).

Also, Pampered Chef wasn't joking when they said this would make 6 servings - it's 6 large servings, and to be honest with you, I was sick of it after eating it for the third meal in a row. But I also get sick of foods very quickly. Unlike my dear friend Nicole, God love her, who ate the same Chicken Tikka Masala from the same Indian place everyday for a month straight while we were studying for the California Bar Exam. She passed; I didn't. Maybe there was something in the curry.

But I digress - to rehash, here's the recipe from my previous post:

Greek Chicken Orzo Skillet

To prepare and freeze:
1 portion Make-Ahead Chicken
2 medium zucchini, cut into ¼-in. pieces
1 can (15 oz) garbanzo beans, drained and rinsed
1 can (14 oz) garlic and onion flavored diced tomatoes
3 tbsp Greek Rub (substitute with lemon zest, dried oregano, and pepper)
To finish and serve:
2 cans (14 oz each) chicken broth
½ cup water
1 lb uncooked orzo
2 oz crumbled feta cheese
½ cup coarsely chopped pitted kalamata olives (optional)
1. Prepare and freeze

In Bag 1, combine chicken and zucchini.

In Bag 2, combine beans, tomatoes and rub.

Seal Bag 2 and place into Bag 1; seal. Freeze for up to three months.


2. Finish and serve!

To cook and serve from freezer:

Add contents of Bag 2, broth and water to (12-in.) Skillet; cover and bring to a simmer over medium-high heat. Cook 8-10 minutes or until mixture comes to a simmer, breaking contents apart as necessary using Bamboo Spatula.
Reduce heat to medium; add orzo. Cover and cook 5 minutes (or halfway through cooking time, according to package directions), stirring occasionally.

Add contents of Bag 1. Cover and cook 5-7 minutes or until orzo is tender and zucchini begins to soften. Remove from heat; top with feta cheese. Sprinkle with olives, if desired.

So let's begin, shall we?


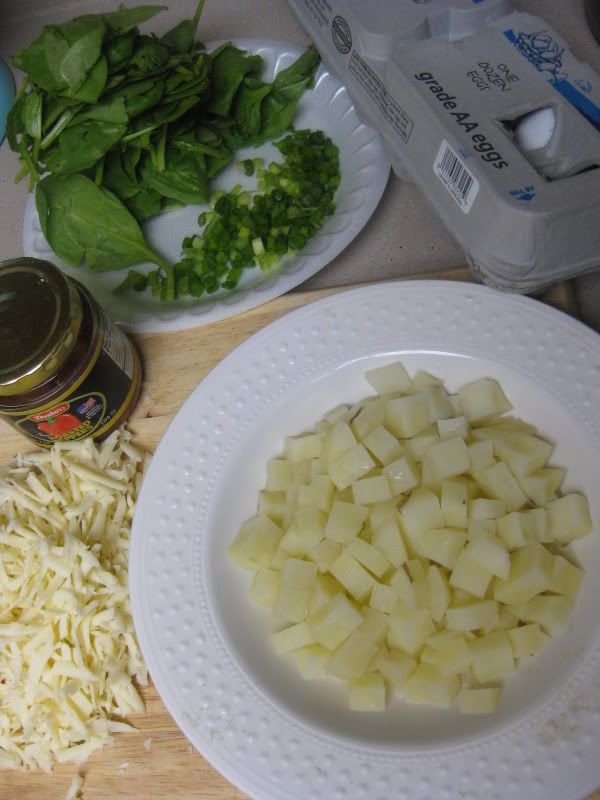
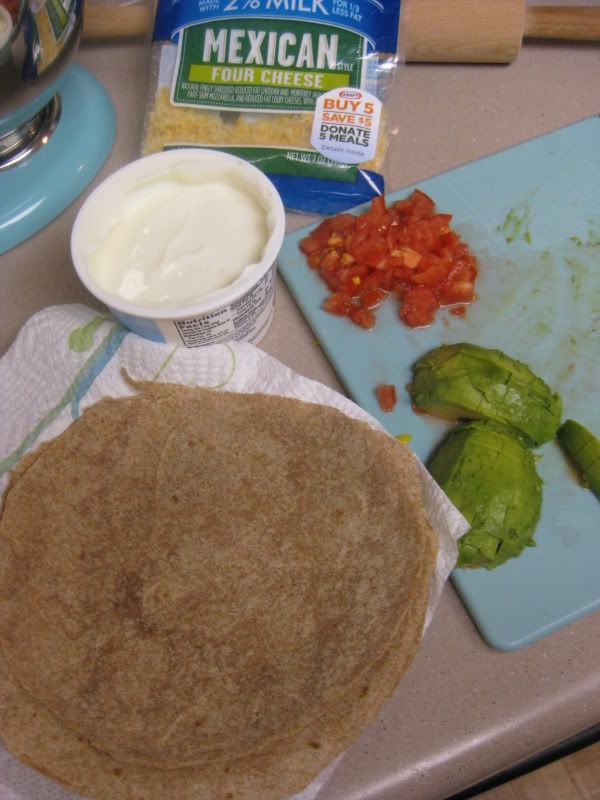
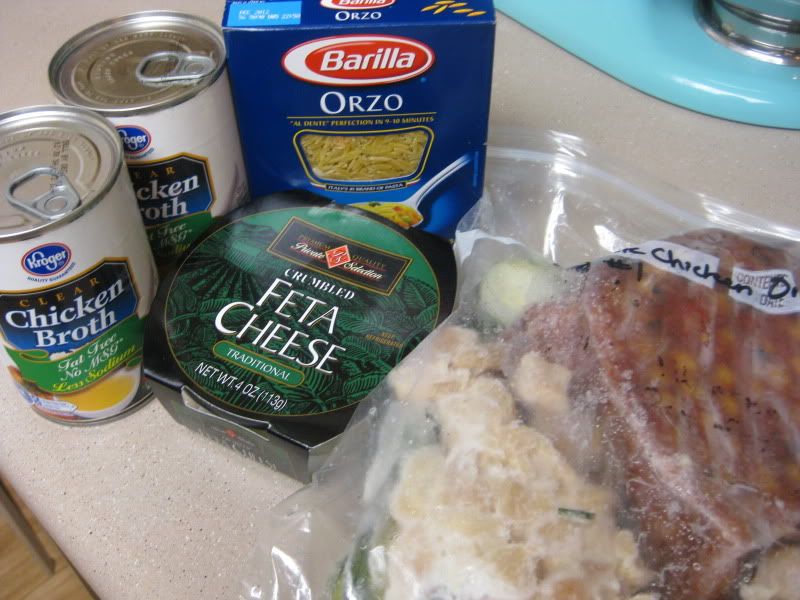
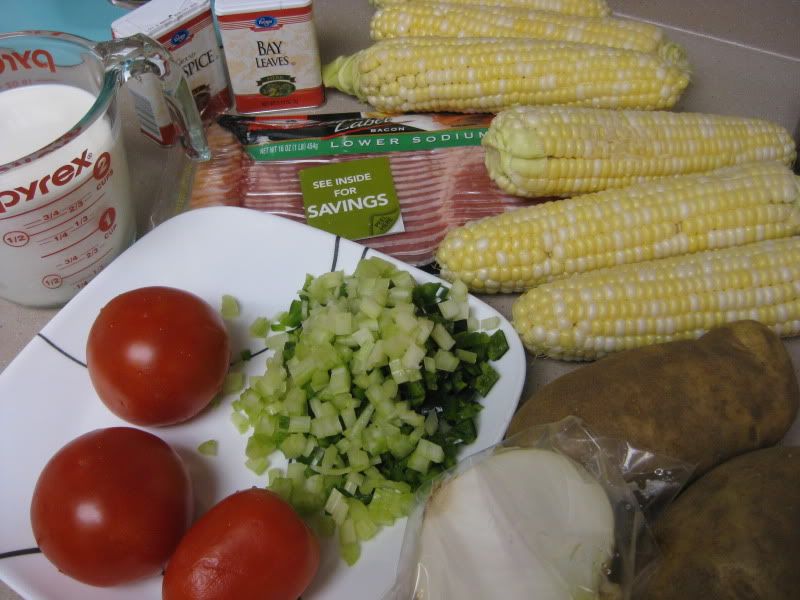
The ingredients: my bag of frozen stuff (as prepared earlier), chicken broth, orzo, feta, olives (not pictured - they're shy).


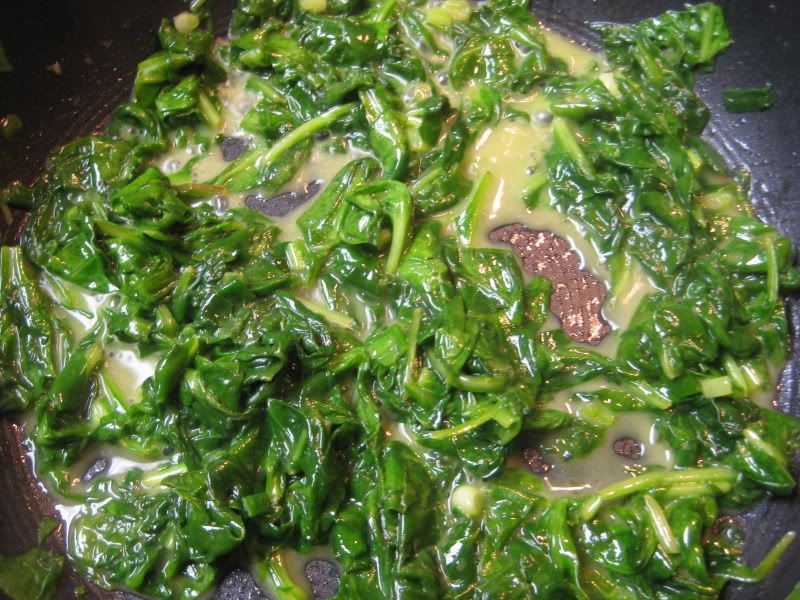
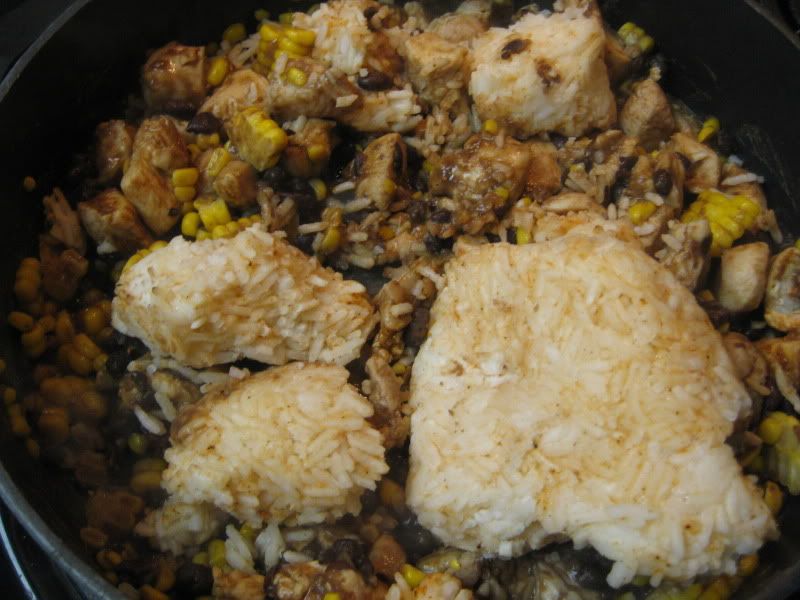
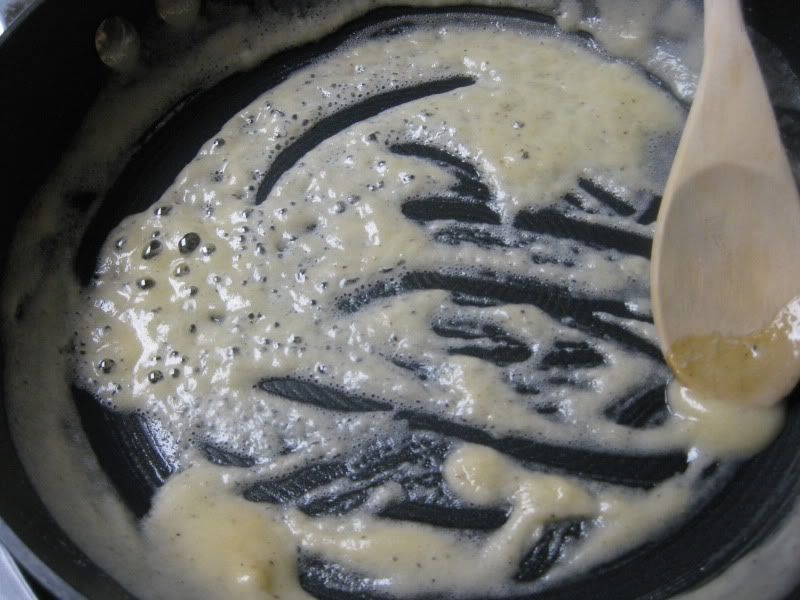
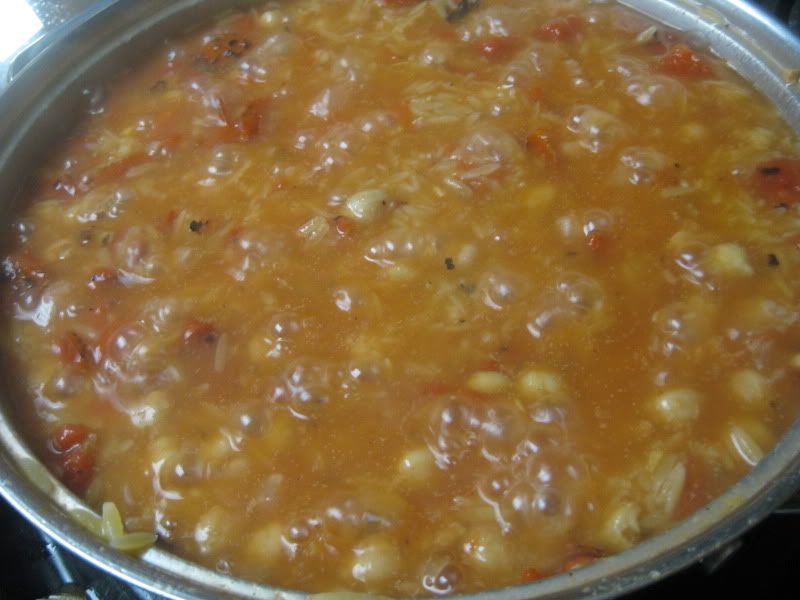
Add the frozen hunk of bag 2 to some water and chicken broth, cover, and bring to a simmer. It looks kinda sketchy right now. I was nervous.


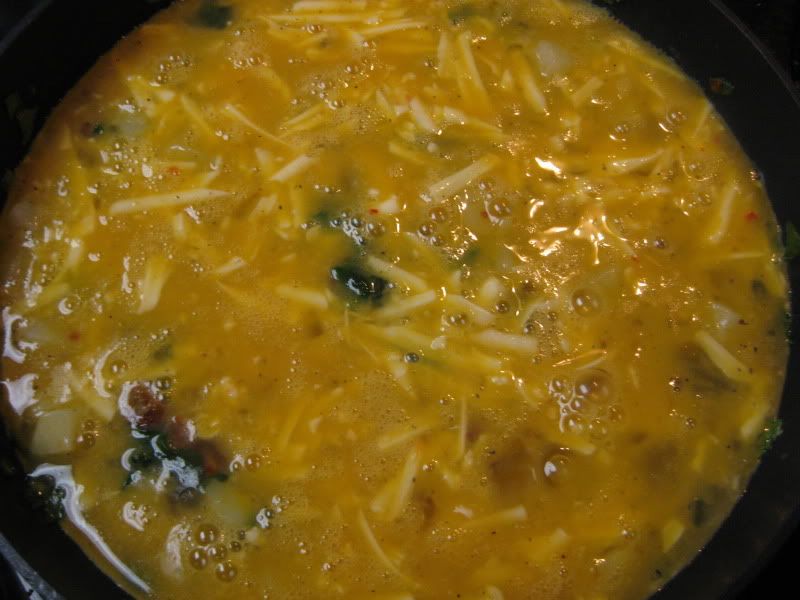
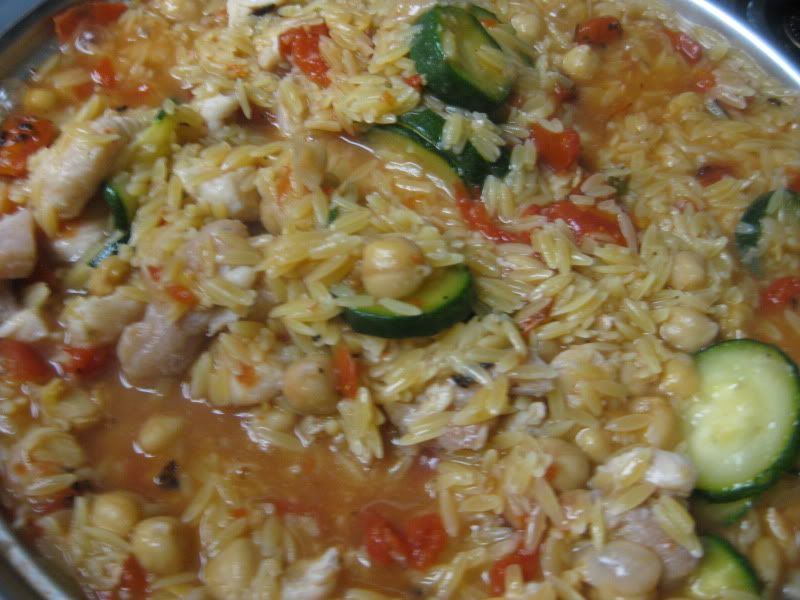
But then it all melts and looks like this - soup! Reduce heat and dump in the entire box of orzo, cover and cook for 5 minutes.


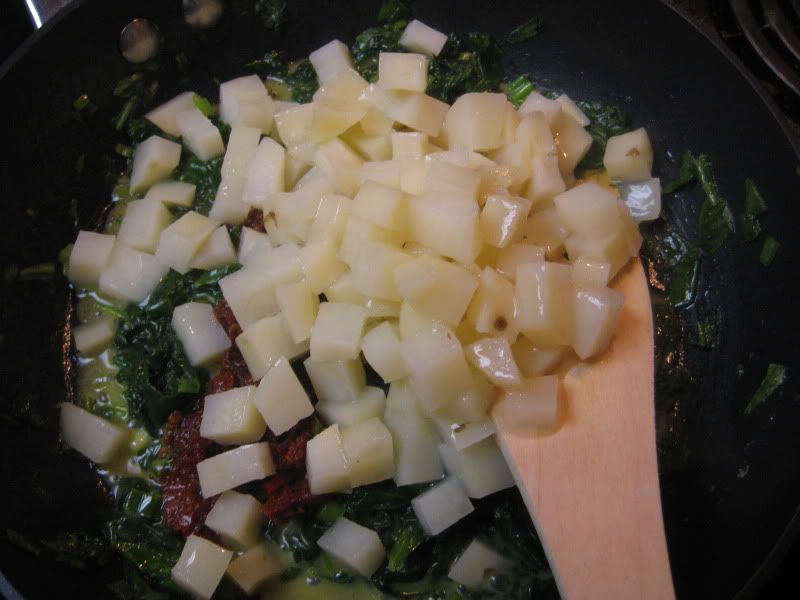
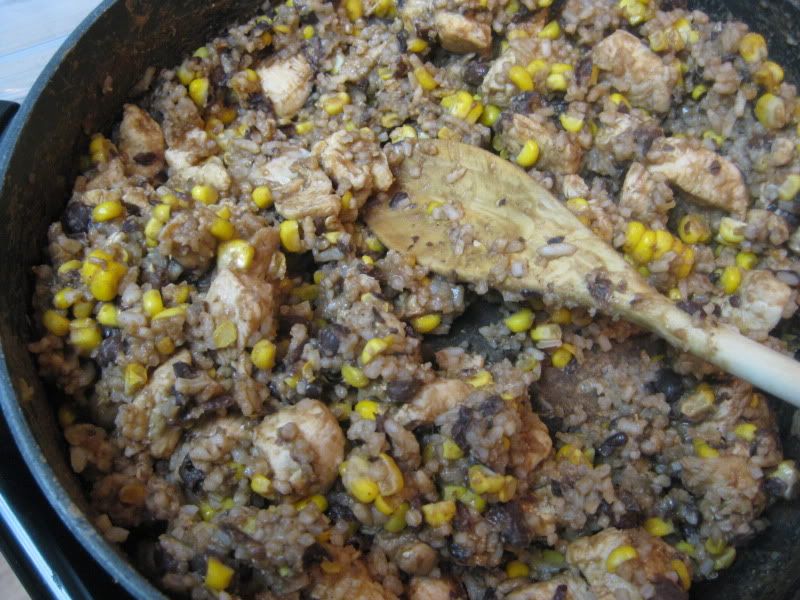
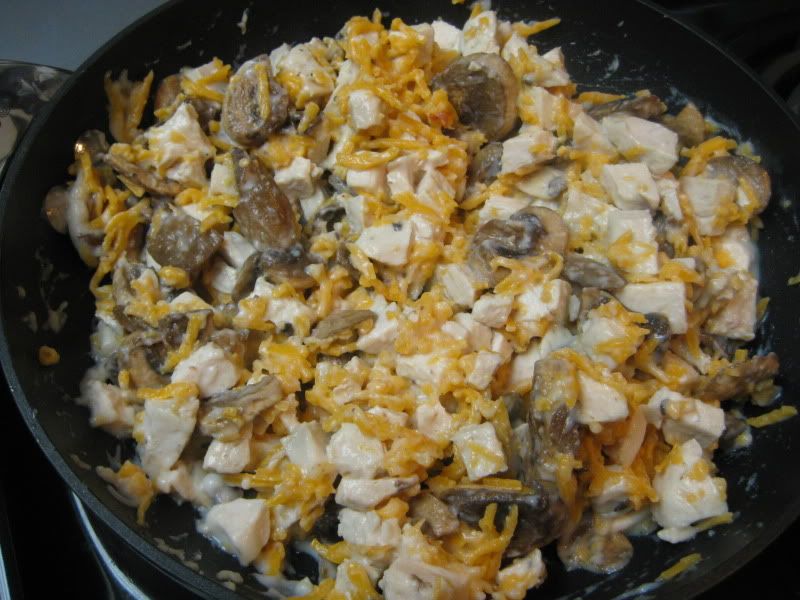
Now, add the other bag, cover, and cook for 5-7 more minutes.


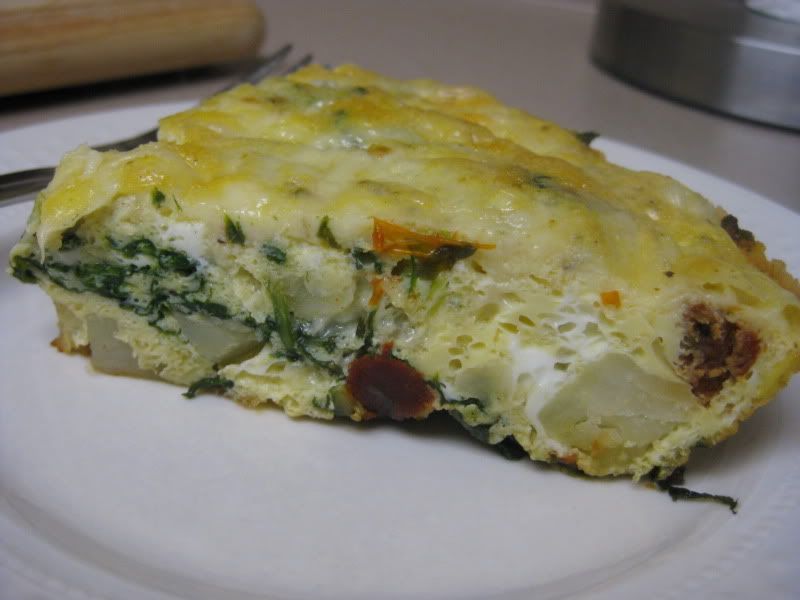
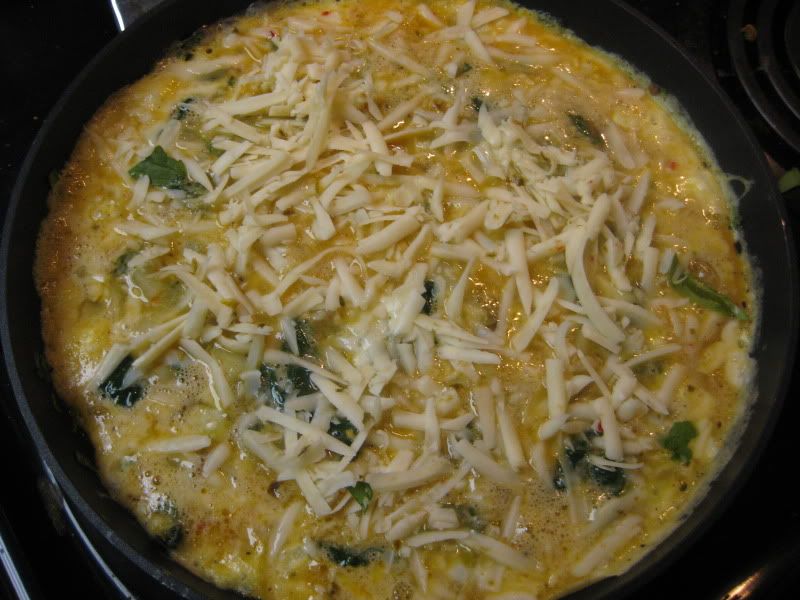
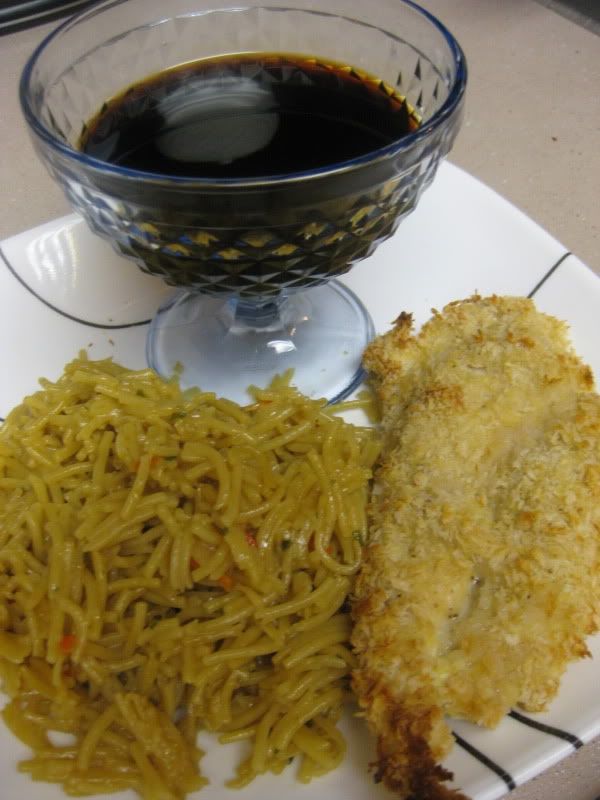
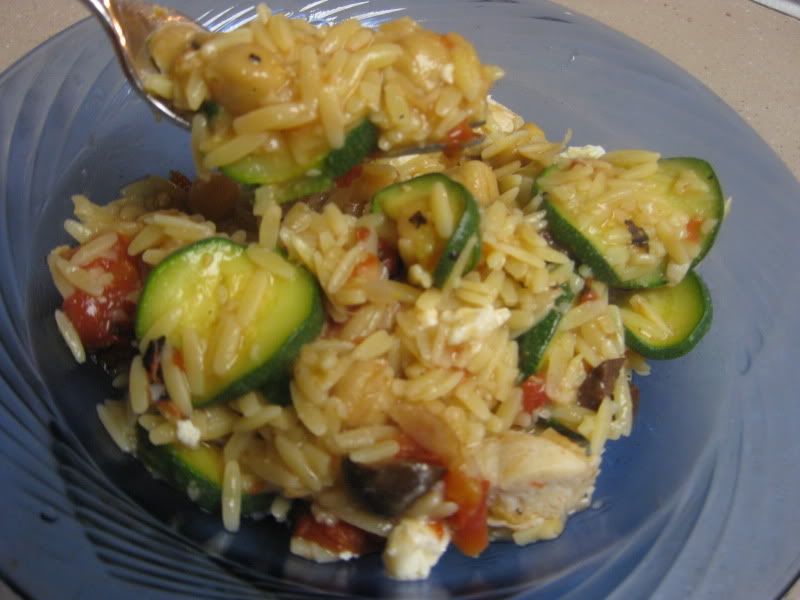
And voila...this is starting to look pretty edible, amirite people? At this point I did a taste test and it was a little bland, so I added some salt and pepper to taste.


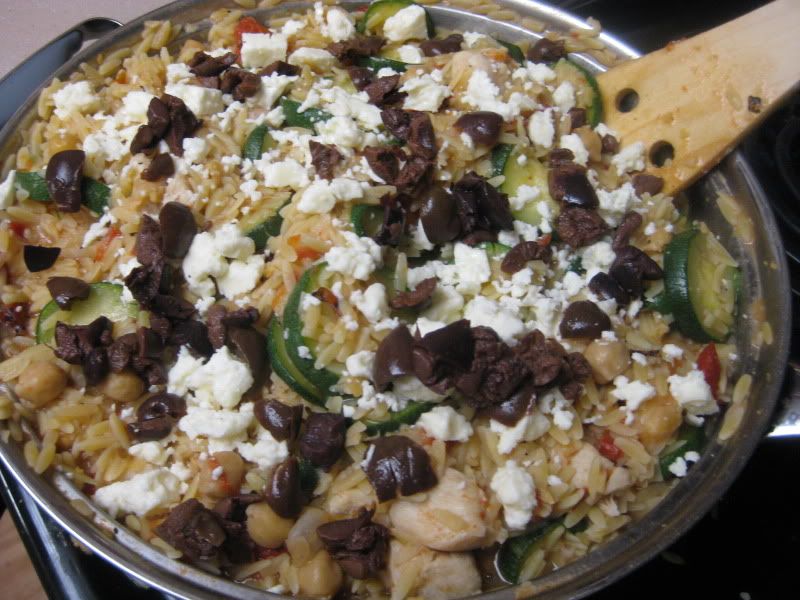
Now sprinkle on the feta and olives, and serve.

Blogging FAIL


I haven't posted since August 4....which is almost 20 days of blogging failure. Sorry folks! It was crazy at work, then I got sick, then it was my birthday, then then then then. (Cue the sad trombone noise). I will be back at it this week with more random foodstuffs and rants.

Wednesday, August 4, 2010

I'm Way Overdue for Some Dessert!


There's entirely too much chicken and bacon being cooked in my apartment - I need to bake and post more desserts. A thousand apologies, faithful readers! Although it might be because when I cook desserts, I tend to eat my body weight in them without restraint (as does my husband). Not good.

I have a couple of those dry cookie mixes from Betty Crocker sitting in my pantry (it's actually a coat closet converted into a pantry because I live in a crappy apartment - it's super ghetto and I call it my "hoarder closet". Maybe if convinced I will post a pic of it so you can all point and laugh). The mixes are surprisingly tasty and very easy, usually requiring only some water, an egg and oil or butter.

Mike loves peanut butter, so I grabbed a quick recipe online at Betty Crocker for Layered Peanut Butter Bars that uses one of the cookie mixes as a base. You could certainly whip up your own peanut butter cookie base from scratch if you are so compelled, but um, I'm lazy and ME WANT COOKIES.


Hi, friends!

Mix the cookie ingredients together until it starts to form a ball.


Press into the bottom of a greased 9x13 pan, pop it into a 350 degree oven, and bake for 15-18 mins.


Once the cookie is done, let cool completely and resist the urge to feast upon it. I never said baking was easy, people.

Now beat the sugar, milk, butter and peanut butter until smooth and then spread on top of the cookie. This whipped stuff is no short of awesome, next time I make the recipe, I'm doubling it!


Next, melt the butter and chocolate chips in the microwave, then spread over cookie and whipped layer. Let the chocolate firm up in the fridge for about 30 minutes or until you can bear it no longer!

Dig in.


Layered Peanut Butter Bars

Cookie Base

1 pouch (1 lb 1.5 oz) Betty Crocker® peanut butter cookie mix
3 tablespoons vegetable oil
1 tablespoon water
1 egg

Filling
1/2 cup butter, softened
1/2 cup creamy peanut butter
2 cups powdered sugar
2 teaspoons milk

Frosting
1 cup semisweet chocolate chips
1/4 cup butter
Heat oven to 350°F. Spray bottom of 13x9-inch pan with cooking spray.

In large bowl, stir all Cookie Base ingredients until soft dough forms. Press dough in bottom of pan using floured fingers. Bake 15 to 18 minutes or until golden brown. Cool completely, about 1 hour.

In small bowl, beat all Filling ingredients with electric mixer on medium speed until smooth. Spread mixture evenly over cookie base.

In microwavable bowl, microwave all Frosting ingredients on High 30 seconds; stir until smooth. Cool 10 minutes; spread over filling. Refrigerate 30 minutes or until set. For bars, cut into 9 rows by 4 rows.

Tuesday, August 3, 2010

Summer Corn Chowder


Another new recipe chock full o'veggies (and yet negated by copious amounts of bacon and cream), this time from the foodie blog,  Food52. Food52 is a pseudo-fancy schmancy blog with oftentimes highbrow recipes and ingredients (blood oranges or swordfish anyone?), but they do have a cool weekly reader challenge where they give one ingredient, readers submit their recipes featuring said ingredient, and a winner is chosen based on reader's votes. This corn chowder recipe was one of those lauded winners.

I'm not going to lie to you - this recipe takes flippin' forever. I made it on a weekday when I got home from work at 6pm, and it wasn't ready until almost 9pm. I was starving and thiiiis close to eating my arm but reconsidered - I didn't think a gnawed limb would look very cute in my new Forever 21 dress. 

So with that in mind, leave this recipe for a boring Sunday. It is pretty delicious but labor-intensive. Lots of chopping and such. It has creamy, sweet tones from the corn and then a little spicy kick from the peppers. I'm a spicy food wimp (revoke my Brown People card ASAP!), and I thought the spice was perfect and not too over the top. Two thumbs up!

My one tip: make sure the potatoes are chopped into small pieces...like smaller than potato salad pieces. One inch square-ish. Otherwise you will be standing around the kitchen waiting for those stupid potato chunks to cook for like an hour, and lack of patience + Rachel the Monster is hungry = HOT MESS.


See! Chock full o'veggies! (And bacon. Cough.)


I wonder how many times I will be forced against my will as a healthy-vegan-gluten-free eater to cook bacon. 


Today is Opposite Day.


Remove the bacon to a paper towel lined plate. Drain off some (not all - that will just be our little secret) of the bacon drippings, and throw in the onions to brown.


Then add the celery and peppers.


Now dump in everything else other than the cream, cover and simmer for 45 minutes. Then add the milk, cream, and pepper and heat through.


Ladle into bowls and garnish with the fairy dust of foods.


Summer Corn Chowder

6 medium ears of corn
6 strips of bacon, cut into 1/2-inch pieces
1 small onion
1 medium poblano, finely chopped
1 jalapeño pepper, seeded and finely chopped
1 small celery rib, finely chopped
3 medium tomatoes, peeled, seeded and finely chopped
2 medium boiling potatoes (about 1 pound), peeled and cubed
1 teaspoon salt
1/8 teaspoon ground allspice
Pinch of sugar
1 small bay leaf
2 cups light cream, at room temperature
1 cup milk
Freshly ground black pepper
Chopped parsley, for garnish


Working over a bowl, cut the corn kernels from the cobs at about half their depth. Then, using the back of the knife, scrape the cobs over the bowl to release all the "milk"; set aside.

In a large saucepan, fry the bacon over moderately high heat, stirring occasionally, until crisp, about 10 minutes. Transfer the bacon to paper towels to drain. Crumble and reserve.

Discard all but 3 tablespoons of the bacon drippings from the pan. Add the onion and cook over moderate heat until golden, 4 to 5 minutes. Add the poblano pepper, jalapeño and celery and cook until slightly softened, about 2 minutes. Add the tomatoes, potatoes, salt, allspice, sugar, bay leaf and the reserved corn kernels and their "milk" and stir well. Cook over moderate heat until mixture begins to sizzle.

Reduce the heat to low. Cover and cook, stirring occasionally, until the potatoes are tender, 35 to 45 minutes. Stir in the cream and milk and bring just to a boil. Remove from heat and season with black pepper to taste. Ladle the chowder into bowls and garnish with the crumbled bacon and parsley.


Shanty 2 Chic