In my spare time, I like to scour the internetz for interesting recipes and blogs about food. I should probably be using said spare time to work out...or clean...or anything remotely productive. But alas. Anyhoo, I found some websites about something called "power cooking". I had never heard of such a thing, and apparently, it's NOT a euphemism for using the microwave (or anything else for that matter - get your mind out of the gutter! Oh wait, maybe that's just me).
So power cooking is basically cooking and freezing multiple meals in one fell swoop, saving you time on a weeknight because you can literally pull a bag from the freezer, heat it up, and have dinner. Or if you're me, saving you from getting Mickey D's because you're being lazy and want to watch a marathon of "16 and Pregnant" on MTV after work with a glass of wine.
I found some recipes from
Pampered Chef for using either boneless skinless chicken breasts or thighs, which happened to be on sale at the grocery store and thought I'd give these shenanigans a whirl. Come along with me on my scary frozen meal journey!
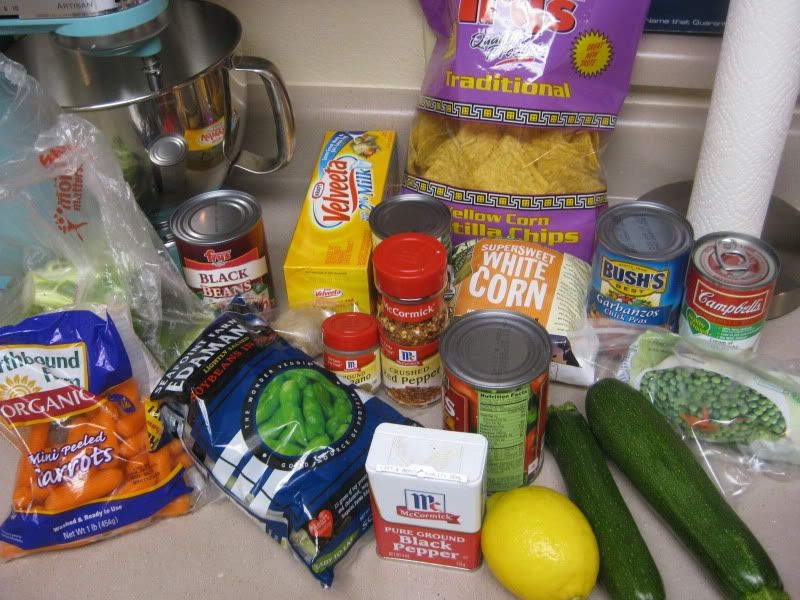
Here's the ingredients - it looks like a lot, but again, this will make five dinners (of six servings each)...so 30 meals total.
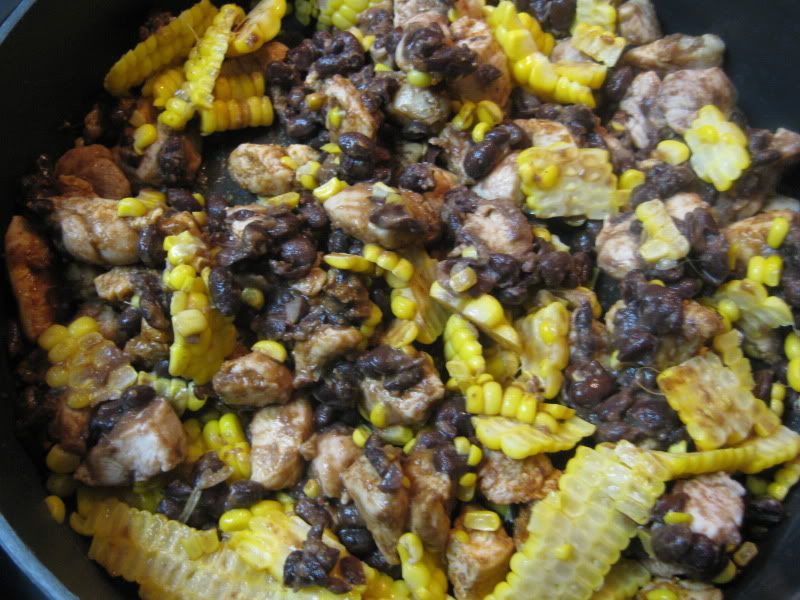
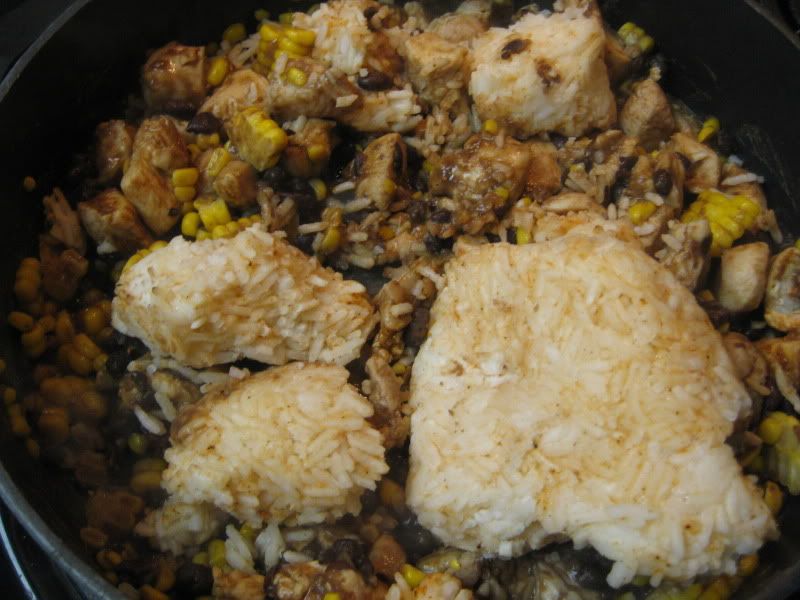
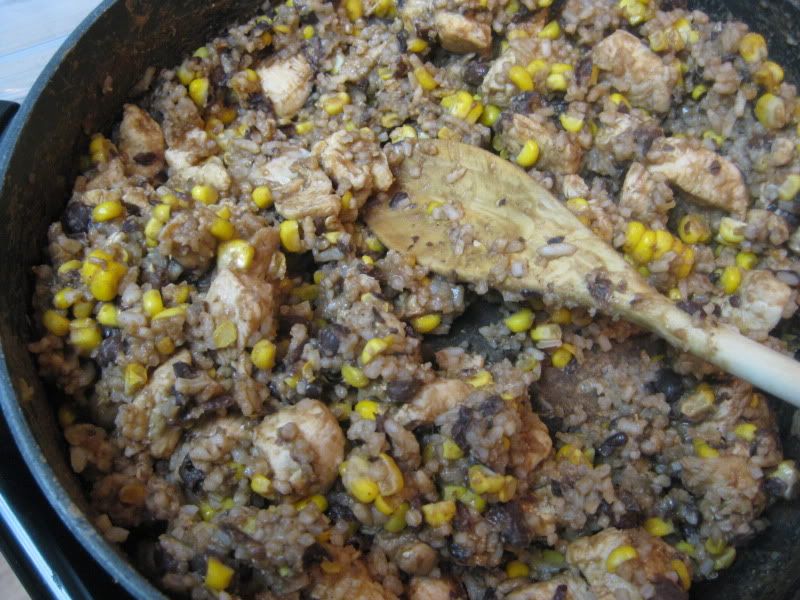
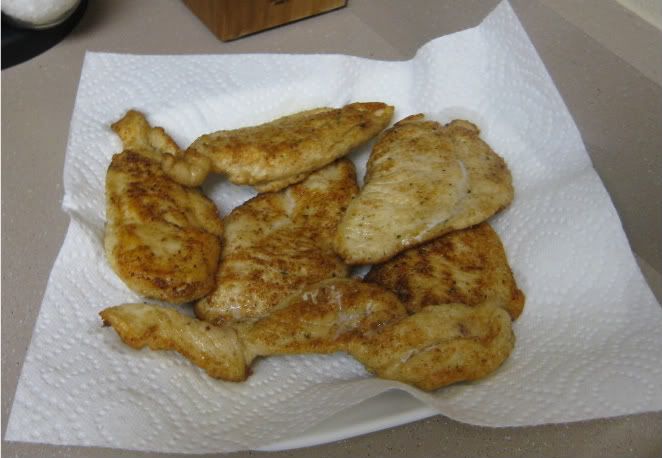
You start with cooking some chopped chicken breast in oil on the stove, one pound of chicken per recipe (the recipes below are for three pounds of chicken, which makes three recipes). I'm fully committing to this - so I'm making all five recipes, which means cooking 5 pounds of chicken.
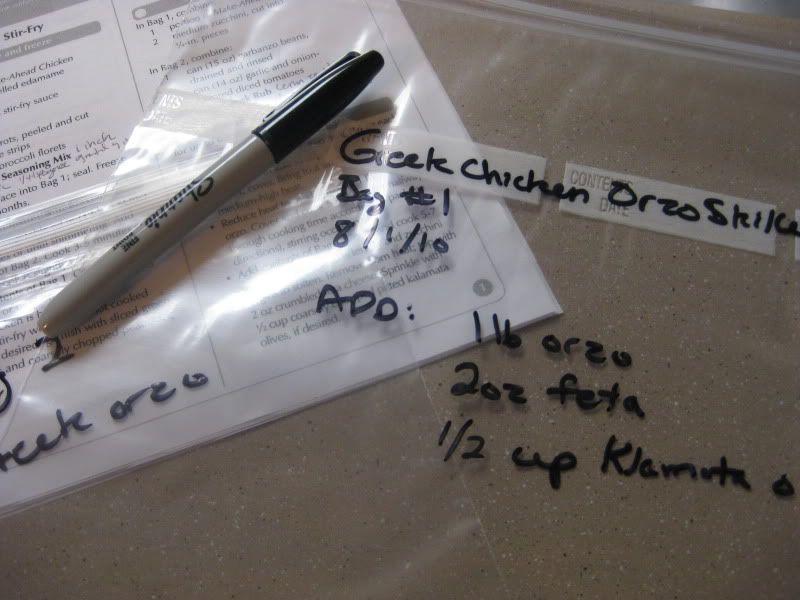
Then get out your freezer bags and permanent markers and start labeling! I included the recipe name, the items that need to be added at the time of serving, and the date.
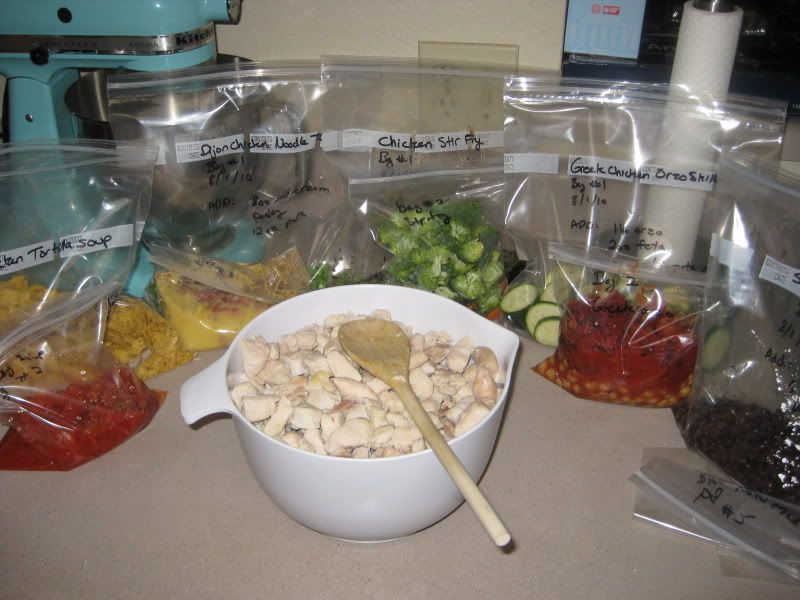
Now you can start filling the bags with the ingredients (listed in the recipes below). Evenly distribute the chicken in the five bags, seal, and mix. Place the bags laying flat in your freezer and you are done!
A printable pdf of the recipes listed below from Pampered Chef can be found
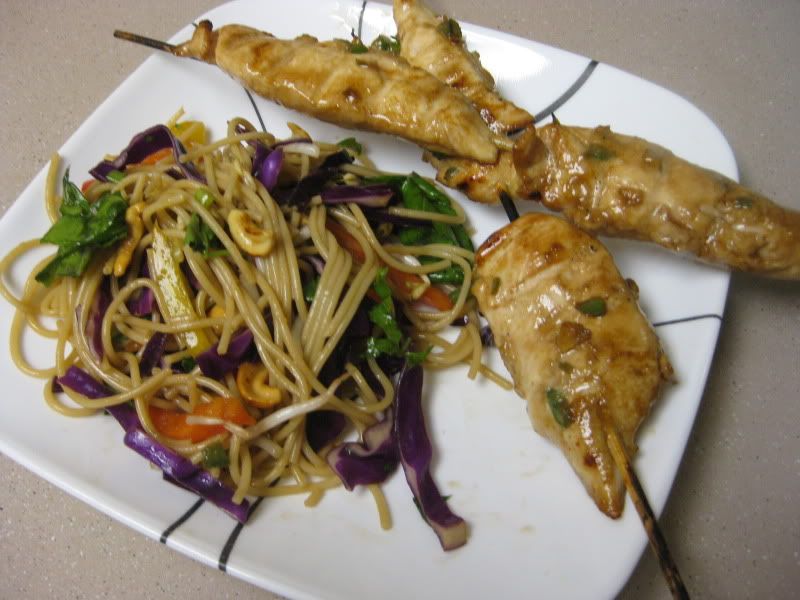
here, and probably will make more sense than my never ending list. I will be updating with future blog posts when I actually sit down and eat some of this stuff - cross your fingers it's edible!
Make Ahead Chicken
3 lb boneless, skinless chicken breast or thighs (or 1 lb per recipe - I'm trying all 5 recipes, so I made 5 lbs of chicken)
1 tbsp vegetable oil
1. Cut chicken into ½-in. cubes using Chef's Knife.
2. Heat oil in (12-in.) Skillet over medium-high heat 1-3 minutes or until shimmering. Add chicken and cook 7-10 minutes or until chicken is no longer pink, stirring occasionally. Drain chicken, if necessary.
3. Divide chicken into three portions.
Stir Fry Chicken
To prepare and freeze
1 portion Make-Ahead Chicken
1 cup frozen shelled edamame (soybeans)
2/3 cup prepared stir-fry sauce
2 medium carrots, peeled and cut into julienne strips
3 cups small broccoli florets
2 tbsp Asian Seasoning Mix (this is a Pampered Chef product that I don't own - you can instead substitute: one 1 inch piece of fresh finely grated ginger, 2 minced garlic cloves, and 1/4 tsp cayenne pepper)
To finish and serve
1 tsp vegetable oil
½ cup water
6 cups hot cooked rice
Sliced green onions and coarsely chopped peanuts (optional)
1. Prepare and freeze
In Bag 1, combine chicken, edamame and stir-fry sauce.
In Bag 2, combine carrots, broccoli and seasoning mix.
Seal Bag 2 and place into Bag 1; seal. Freeze for up to three months.
2. Finish and serve!
To cook and serve immediately :
Heat oil in (12-in.) Skillet over medium-high heat 1-3 minutes or until shimmering. Add contents of Bag 2. Cook 3-5 minutes or until broccoli is slightly tender.
Add contents of Bag 1. Cook 3-5 minutes or until broccoli is crisp-tender and chicken is hot.
Serve stir-fry with rice. If desired, garnish with sliced green onions and coarsely chopped peanuts.
To cook and serve from freezer :
Omit oil. Add contents of Bag 2 and water to (12-in.) Skillet; cover. Bring to a simmer over medium-high heat.
Add contents of Bag 1 to Skillet; cover. Cook 4-6 minutes or until mixture is heated through and vegetables are crisp-tender, breaking chicken apart as necessary using Bamboo Spatula.
Serve as directed above.
Yield: 6 servings
Dijon Chicken Noodle Toss
To prepare and freeze
1 portion Make-Ahead Chicken
2 cups frozen peas
¼ lb deli ham, diced into ¼-in. pieces
1 can (10¾ oz) condensed cream of chicken soup
2 tbsp Dijon mustard
To finish and serve
12 oz uncooked rotini pasta
½ cup water
8 oz sour cream
1 oz grated fresh Parmesan cheese (optional)
¼ cup snipped fresh parsley
1. Prepare and freeze
In Bag 1, combine chicken and peas.
In Bag 2, combine ham, soup and mustard.
Seal Bag 2 and place into Bag 1; seal. Freeze for up to three months.
2. Finish and serve!
To cook and serve immediately:
Cook pasta according to package directions; drain.
Meanwhile, place water and contents of Bag 2 in (12-in.) Skillet; cover. Bring to a simmer over medium-high heat, stirring occasionally.
Add sour cream to Skillet. Reduce heat to medium; add contents of Bag 1. Cover and cook 4-6 minutes or until chicken is hot, stirring occasionally.
Toss cooked pasta with parsley. Spoon chicken mixture over pasta and sprinkle with Parmesan cheese, if desired.
To cook and serve from freezer:
Cook and drain pasta as directed above.
Meanwhile, place water and contents of Bag 2 in (12-in.) Skillet; cover. Bring to a simmer over medium-high heat; cook 8-10 minutes, stirring occasionally and breaking
contents apart as necessary using Bamboo Spatula.
Proceed as directed above.
Yield: 6 servings
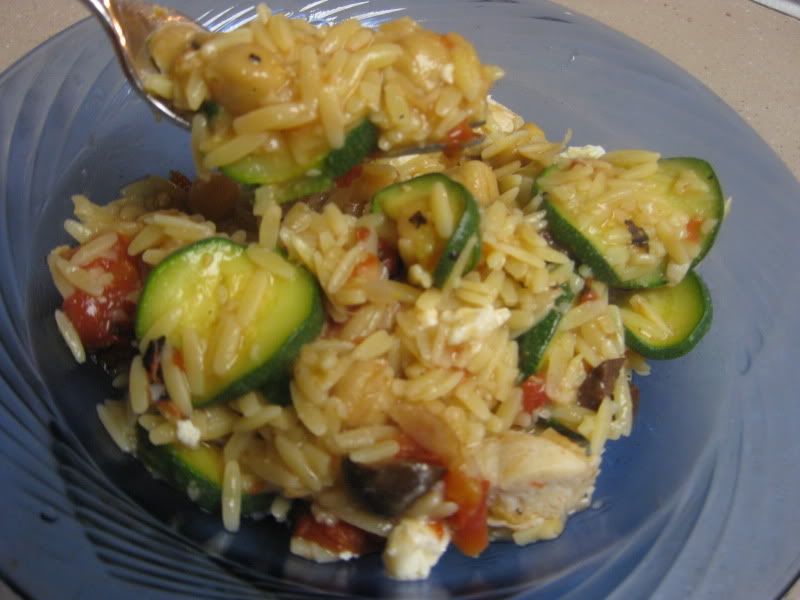
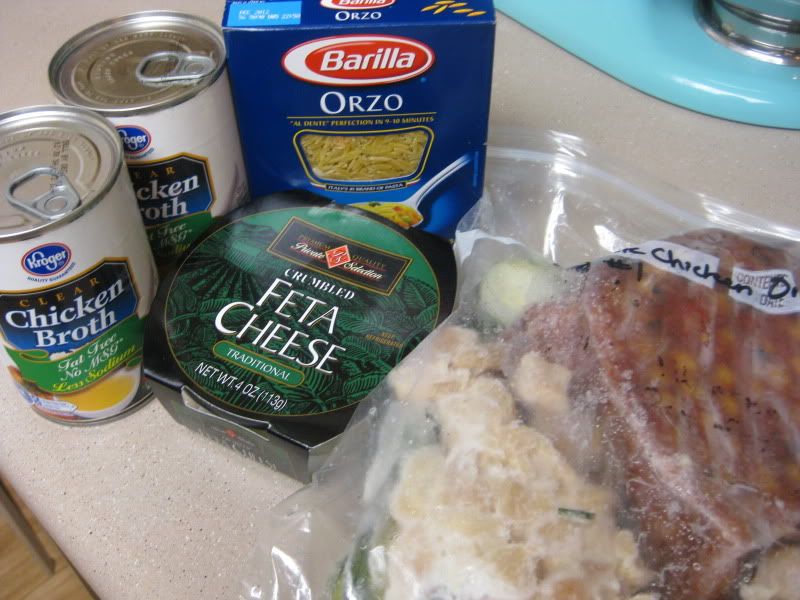
Greek Chicken Orzo Skillet
To prepare and freeze
1 portion Make-Ahead Chicken
2 medium zucchini, cut into ¼-in. pieces
1 can (15 oz) garbanzo beans, drained and rinsed
1 can (14 oz) garlic and onion flavored diced tomatoes
3 tbsp Greek Rub (substitute with lemon zest, dried oregano, and pepper)
To finish and serve
2 cans (14 oz each) chicken broth
½ cup water
1 lb uncooked orzo
2 oz crumbled feta cheese
½ cup coarsely chopped pitted kalamata olives (optional)
1. Prepare and freeze
In Bag 1, combine chicken and zucchini.
In Bag 2, combine beans, tomatoes and rub.
Seal Bag 2 and place into Bag 1; seal. Freeze for up to three months.
2. Finish and serve!
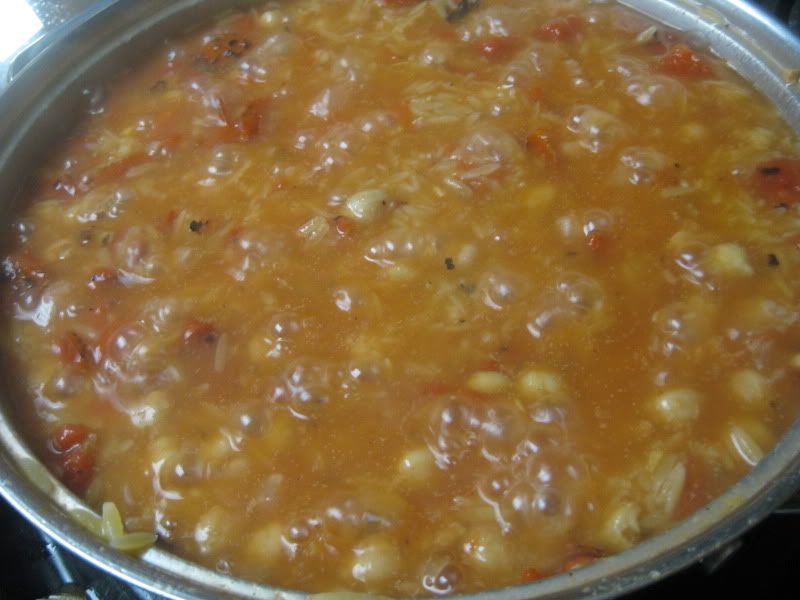
To cook and serve immediately:
Add contents of Bag 2, broth and water to (12-in.) Skillet; cover and bring to a simmer over medium-high heat.
Reduce heat to medium; add orzo. Cover and cook 5 minutes (or halfway through cooking time, according to package directions), stirring occasionally.
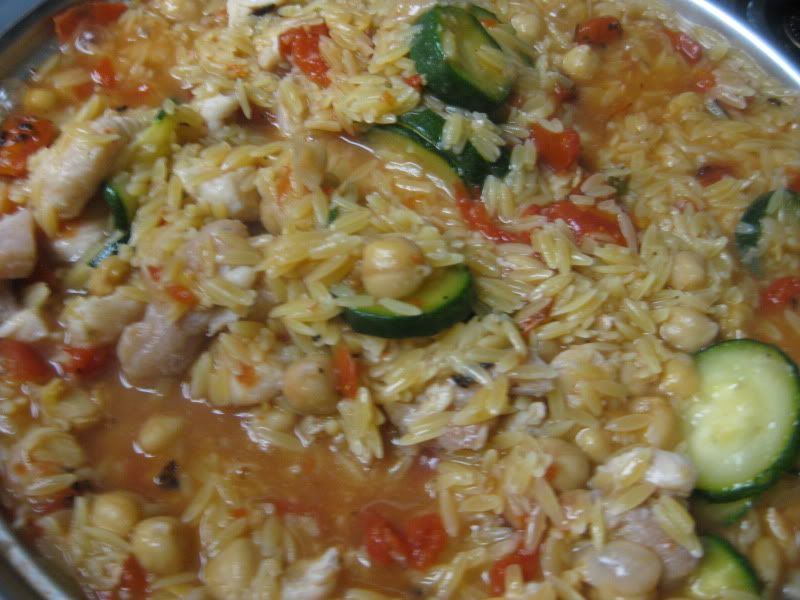
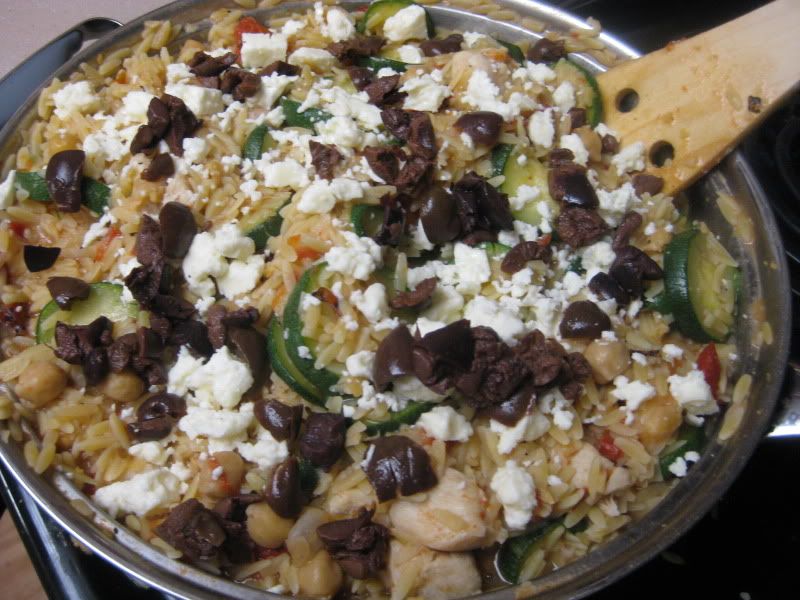
Add contents of Bag 1. Cover and cook 5-7 minutes or until orzo is tender and zucchini begins to soften. Remove from heat; top with feta cheese. Sprinkle with
olives, if desired.
To cook and serve from freezer:
Add contents of Bag 2, broth and water to (12-in.) Skillet; cover and bring to a simmer over medium-high heat. Cook 8-10 minutes or until mixture comes to a simmer, breaking
contents apart as necessary using Bamboo Spatula.
Proceed as directed above.
Yield: 6 servings
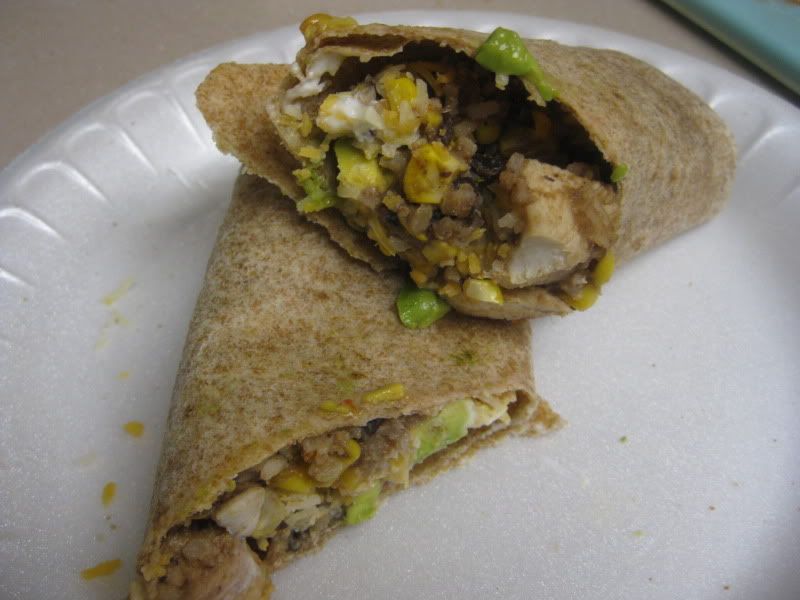
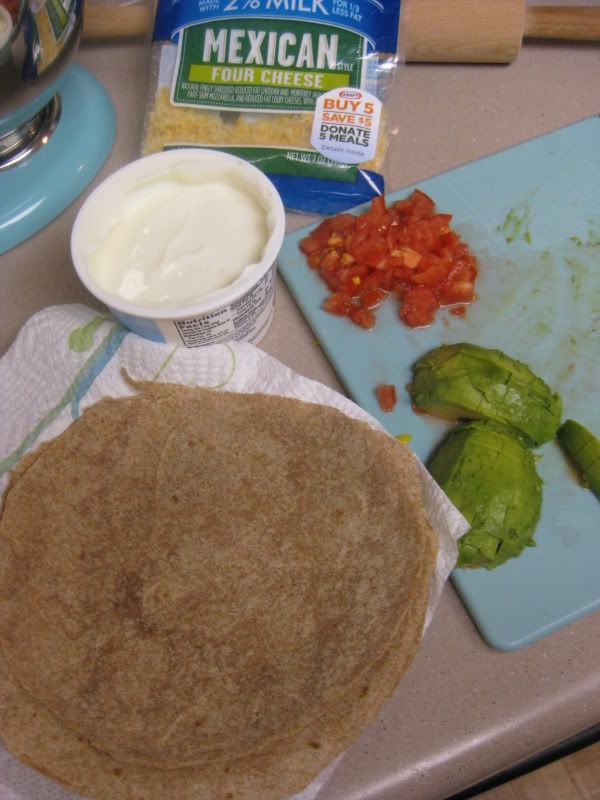
Smoky Black Bean Chicken Wraps
To prepare and freeze
1 portion Make-Ahead Chicken
1 can (15 oz) black beans, drained and rinsed
3 tbsp Smoky Barbecue Rub, divided
2 cups cooked rice
To finish and serve
½ cup water
4 oz shredded cheddar cheese
6 11-in. flour tortillas
Shredded lettuce, diced tomatoes and barbecue sauce or Louisiana hot sauce (optional)
1. Prepare and freeze
In Bag 1, combine chicken, beans and 2 tbsp of the rub.
In Bag 2, combine rice and remaining 1 tbsp rub.
Seal Bag 2 and place into Bag 1; seal. Freeze for up to three months.
2. Finish and serve!
To cook and serve immediately:
Omit water. Place contents of Bags 1 and 2 into (12-in.) Skillet. Cook over medium-high heat 3-5 minutes or until chicken is heated through.
To assemble wraps, divide cheese evenly among tortillas; top with chicken mixture and optional ingredients, if desired.
Roll up tortillas tightly. Cut wraps in half on a bias
and serve.
To cook and serve from freezer:
Add contents of Bag 1 and water to (12-in.) Skillet; cover. Cook over medium-high heat 6-8 minutes or until hot, breaking chicken apart as necessary using Bamboo Spatula.
Add contents of Bag 2 to Skillet; cook 4-6 minutes or
until mixture is heated through.
Assemble wraps as directed above.
Yield: 6 servings
Cheesy Chicken Tortilla Soup
To prepare and freeze
1 portion Make-Ahead Chicken
3 cups tortilla chips, finely crushed
2 cups frozen corn kernels
8 oz pasteurized process cheese spread, cut into 1-in. cubes
1 can (14.5 oz) diced tomatoes with green chilies
2 tbsp Chipotle Rub (2-3 tbsp chopped, canned chipotle peppers can be substituted for the Chipotle Rub)
To finish and serve
2 cans (14 oz each) reduced-sodium chicken broth
Optional toppings, such as shredded cheddar cheese, snipped fresh cilantro, diced tomatoes and additional crushed tortilla chips
1. Prepare and freeze
In Bag 1, combine chicken, chips and corn.
In Bag 2, combine cheese spread, tomatoes and rub.
Seal Bag 2 and place into Bag 1; seal. Freeze for up to three months.
2. Finish and serve!
To cook and serve immediately:
Add contents of Bag 2 and broth to (4-qt.) Casserole.
Bring to a simmer over medium heat; cook 12-14 minutes or until cheese is melted and mixture is smooth, stirring occasionally.
Add contents of Bag 1 to Casserole; simmer 4-6 minutes or until soup is thickened.
Serve soup with optional toppings, if desired.
To cook and serve from freezer:
Cook contents of Bag 2 and broth as directed above, whisking occasionally using Silicone Sauce Whisk.
Add contents of Bag 1 and cook as directed above, breaking chicken apart as necessary using Bamboo Spatula.
Serve soup with optional toppings, if desired.
Yield: 6 servings